Want to learn how we do our fabric covered pumpkins?
Well, it's a cute little story.
Mom has been using acrylic gloss and fabric to make Floorcloths for many, many years now and we have since progressed to using acrylic gloss for making fabric covered trays, fabric covered Japanese lanterns and fabric collages on canvas.
It was only natural that one of these days we would slap some acrylic on a Pumpkin, too.
And today, being a slow-ish day at the store and the day before I leave for a little mini vacation, that is just what we did.
And now I am passing this wisdom on to you.
Easy Peasy.
Here's what you're gonna need:

1 Brush (I like the natural bristle kind- run your hands over it a few times to get out any loose bristles)
1 small container of acrylic gloss which you can get at Alewives Fabrics if you are local. If not, you can get it at most any art supply store. (Note: we like Blick's acrylic gloss medium or Liquitex Acrylic Gloss works really well, too. I recommend Liquitex if you are going to keep your pumpkin outside... the Blick's will work just fine, but in the morning when it is dew-y or when the weather is rainy, I have noticed that the Blick's tends to turn white. Don't worry, though. As soon as the air dries up, your pumpkin will turn clear again)
1 plastic tablecloth (or you can cut up a garbage bag) to protect your work surface
Scraps of fabric (!)
A note about acrylic gloss: when it is still wet, acrylic gloss will wash out with water, but after about 5 minutes, the acrylic will dry and it will be almost impossible to remove it from clothing, your tablecloth, etc. The moral of the story is to clean up any messes as they happen.
Here's what you do:
1. Clean and dry your pumpkin.

2. Working on a small section of pumpkin at a time, cover the surface of the pumpkin with acrylic gloss. The gloss goes on looking milky white, but it will dry clear.

3. Place fabric on top of the area you just covered, and then paint some acrylic gloss on top of the fabric, too. Don't be too stingy with the gloss, but don't slop it on, either. You want just enough gloss to completely saturate the fabric.

4. Repeat this process working one section at a time until you like the way the pumpkin looks. Remember that the gloss will start to dry after about 5 minutes, so resist the urge to go back and "fix" things that have been drying. If you do, you will incorporate air into the gloss and it will dry opaque, rather than clear.

5. Let your pumpkin dry thoroughly (overnight, perhaps?) and that is all you need to do!!!
You can put your pumpkin outside and it will hold up just fine (although I will warn you, the added embellishment makes your pumpkin a prime target for being snatched and smashed. I know of which I speak).
You can do all kinds of things with this technique... A "crazy quilt" pumpkin (paint the embroidery stitches on with acrylic craft paint), a "Denyse Schmidt" style pumpkin (that's what I did), or you can use a great focus print (like the Very Hungry Caterpillar print Jessica used).

Since you don't have to worry about seam allowances, you can cut pretty flowers, fruits, or other shapes from the fabric you are using (like Jessie did with her "Pears and Apples" pumpkin).

If you have a favorite quilt pattern, you can translate that onto the pumpkin, too.
This is a great project to do with kids, because none of the materials are toxic and everything cleans up with hot water and soap.
If you do make one of these pumpkins, I would love to see it.
Send me an e-mail (rhea@alewivesfabrics.com) or leave a link to your pumpkin in the comments section. This is where it would behoove me to have a flickr page, but sadly I do not.
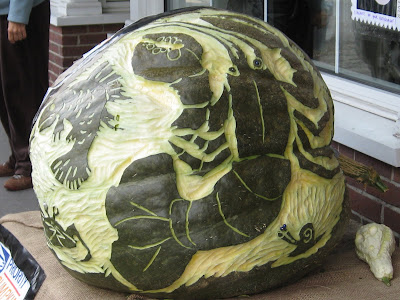
And I will leave you with some more pictures from PumpkinFest and from our own personal PumpkinFest that we had this afternoon.


Ollie and I are off to Bar Harbor tomorrow for a little weekend getaway (and to make some wedding plans).
I will see you when we get back!!!
XO,
Rhea

6 comments:
Thank you! I seriously think we will try this...easier than a very sharp knife with my 4 year old!
This is awesome! I have to try this.
Oh man! Now I have another project. :)
so many cool pumpkins,love it
Wow, how cool! Thanks for sharing! I hope you have a delightful weekend getaway!
Hugs from emily in Norway
Love, love, love this idea!!! can't wait to try it with the kiddoes! Wish I could just pop on over to your store--we so love Maine, but it's just a little too far from Kentucky!
Post a Comment