Thursday, September 27, 2012

What do you think?


Pro or con?

What's your position on the "hand-in-shape-of-a-heart-over-belly" pose... ( I kinda like it...)

With goldenrod and hint of Early Empire Cinch Belt.

Yes, I have made yet another project from Handmade Beginnings.


Ollie and I had a great photo shoot with my very talented friend Megan the other afternoon.

Ollie will never be a "photo shoot" kinda guy, but he took one for the team.


I've got a post brewing about the different Early Empire Cinch Belts I've made, but I was excited to share a couple of these photos with you today.


Thanks, Megan, for an awesome photo shoot and for documenting the pregnancy.

Thanks, Mark and Deb, for letting us use your backyard.

Thanks, Natasha, for the photo shoot hair.

Thanks, Ollie for being a trooper... love ya, babe!


XO,

Rhea

Tuesday, September 18, 2012

Canning!


 That's salsa, tomato soup, and ketchup from left to right, people, and there's more where that came from...

Thanks to an abundance of tomatoes and inheriting a gigantic stash of my Mom's old canning jars (I think the metal-handled jars may be older than I am...) we have lots of lycopene-y goodness to get us through the winter.

 Just in time for me to catch a cold... blechh.


Have you ever made your own ketchup?

It takes a reeeaaalllyyy long time, but dang, it tastes soooo good.

Anybody going to the fair this weekend?

(I can't wait.)

XO,

Rhea


Saturday, September 15, 2012

Opinions wanted!


What do you think?

Modern, traditional, or both?


Recently I have been having a discussion with a member of our local quilt guild that has really gotten my wheels turning...

The discussion basically boils down to this:

What makes a "modern" quilt?

A "modern" fabric?

A "modern" quilter?

In my opinion, there is a lot of crossover between what is considered "traditional" quilting and what is considered to be "modern" quilting.

When Denyse Schmidt was here a couple of weeks ago, I was so pleased to hear her echo this sentiment, the idea of which could not be more beautifully illustrated than in her latest book, which, ironically enough, is entitled Modern Quilts, Traditional Inspiration.

So, with an undeniable "modern quilt movement" going on right before our very eyes, what makes the modern quilt movement "modern?"

If you study some of the prints we carry by "modern" designers, you'll see that they are often riffs on vintage fabric designs that have been recolored and revived into a "modern" palette.

Take a look: Jennifer Paganelli, Amy Butler, Denyse Schmidt... they are all reinterpreting historical designs to have a more contemporary sensibility.

Think of some of the most popular projects in the modern quilting world today: they are also some of the most traditional (English paper piecing, embroidery, foundation piecing, applique).

So, where do we draw the line between "modern" and "traditional?"

The conclusion I have come to is that "modern" quilting means taking the best ideas from "traditional" quilting, but then reinterpreting those ideas to suit today's quilter.

That may mean eschewing the traditional idea that every quilt needs a "light," a "dark" and a "medium" (or any contrast at all for that matter), in favor of a more "blended" grouping of colors.

It may mean that you use large prints in small applications.

It may mean that your points don't have to match up.

It may mean that you use a fabric other than quilting weight cotton.

It may mean that you mix and mingle different types of fabric in a single quilt

Wait a minute, though... doesn't that sound like I'm describing the very origins of quilting itself???

Back in the day, these ideas had to be adhered to in order to preserve fabric and get the most from every last scrap to keep your family warm.

Today, though, these ideas are followed to express one's creativity.

And one more thought...

I believe that since quilters who identify themselves as "modern" are more likely to ease up on some of the "traditional" rules, they are also more likely to have a positive, encouraging experience.

This may explain why there seems to be a rift between "traditional" and "modern" quilters.

I've heard a lot of new quilters (who would most likely identify themselves as "modern") complain that their local, "traditional" guilds and even some "traditional" fabric stores just aren't friendly, and they make them feel as though their quilts aren't real or don't merit any attention because they weren't made using traditional skills and ideas.

My discussion with the local guild member has lead me to draw my own conclusions about what "modern" means, but I would also like to ask for your help:

What do YOU think makes a "modern" quilter or quilt?

What do YOU think of "traditional" quilting methods and quilt guilds?

Opinions, please!

XO,

Rhea


Thursday, September 13, 2012

The humble (yet mighty) square

I love patchwork.  

I could sew simple squares together all day long and be perfectly happy.

As a matter of fact, at the shop, some of our most popular and enduring projects are those that use just one shape: a simple square.

What's not to love about a simple square?

So friendly, so unassuming, so attainable...

And depending on your choice of fabrics: so different (vive le difference!)

To that end, I thought I'd share with you some of our shop samples and show you how beautiful and versatile a simple grid of patchwork squares can be...


These mellow squares are teeny: they finish at just 2" square and were cut from a Bali Pop.
I'm using this grid for a pattern I'm writing for the shop.  I love the pop of orange in there and I always love a good use for a Bali Pop.


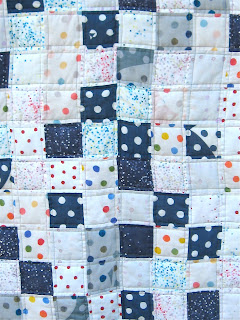
Do these squares look familiar?  They became Baby Boy Butler's Patchwork Sleeping Sac from my last post.  These were all pieced together from scrippy-scraps in my stash.  They're pretty teeny squares, too, and finish at 2" square.  They're a great size to use for English Paper-Pieced Hexagons.


 These squares are a bit larger: they're cut at 4.5" square and finish up at 4".  I had the gals at the shop stitch this up when the umpteenth customer came in and exclaimed how much they loved the voile we carry, and how SOFT it was, but what would you do with it???  Umm, how about making a quilt?


 And then we loved the first one so much that we had to make a second one... This quilt is so soft and buttery... its' not super big:  45" by 54" or so.  The best part is you only need 8 fat quarters to make this quilt.

Let me say that again:

You only need 8 fat quarters to make this quilt.

Because the voile fat quarters are larger than regular fat quarters (18" by 27" vs. a standard fat quarter at 18" by 22"), you get a bit more mileage out of them.  Plus, the humble (yet mighty) square means you waste hardly any fabric at all.

Didn't I tell you there was a lot to love about a simple square?


And last but not least, our latest shop creations: the Nani Iro Patchwork Quilts!

Pam and I stitched these up sometime in July.  Much like the beloved voile, people will come into the shop and just fall head over heels in love with the Nani Iro fabrics, but then wonder about what to do with them...

My standard response?

You cannot go wrong with simple patchwork squares.

So, we stitched up a couple of samples.


The fabric is so lovely, you want to keep the pattern simple (what's simpler than a square, I ask?) and for this quilt (which measures in at a deliciously-cuddle-worthy 40" by 45"), all you need is 10 fat quarters.  That means that even with the rather dear Nani Iro fabrics, your quilt top will only cost you $55.00, and ladies and gentlemen, I guarantee you will love this simple quilt to bits.  Best $55.00 you ever spent.

Want to make your own simple patchwork quilt?

I recommend a 4.5" square (you seem to get a lot of mileage for that size), a handful of 10 fat quarters or so, and 1.5 yards of a backing material.

I like the 1.5 yards because you can easily make a throw-size quilt without having to piece a backing.

1/2 yard should be plenty for a binding.

Of course, Charm Squares would work splendidly (and they're already cut for you!).

A patchwork throw in quilting cottons would be amazing (think of all the combinations you could make!), and next on my radar is a velveteen patchwork throw...

We either tie our quilts or quilt with a walking foot in a simple straight line pattern, always keeping a quarter inch away from the seams.

And of course, if you are using the voile or the double gauze, the wool batting is a must!

Thank you for entertaining my rambling on about the humble (yet mighty) square.

I've wanted to get this post out of my system for a long time!

XO,

Rhea


Thursday, September 6, 2012

A Patchwork Sleeping Sac for Baby Boy Butler


Hello friends!  

I have finally finished the Patchwork Sleeping Sac from Anna Maria Horner's Handmade Beginnings book and I have to admit I am a little proud to share it with you today.  

Let me just take a moment to sing the praises of Handmade Beginnings one more time... the projects in the book are fabulous and the instructions are extremely well written.  That Anna Maria Horner gal ain't no slouch: she certainly crosses her "t's" and dots her "i's."  If you're going to buy one sewing book for babies and/or pregnancy in general, this should be the one.  It's just that good.

I started the Sleeping Sac waaaay back when I didn't know if we were having a boy or a girl, and as you see, my fabric choices aren't the most "masculine," but those things don't really bother me.  

At first I had decided to wait until finding out the sex of the baby before beginning the project, but then a very wise customer (I believe it was Miss Nena C...) pointed out that if I made the Sleeping Sac from unisex fabrics, we could use it in the future for aaalll our babies.  

Since I want many babies some day, I thought this was very good advice and began making my patchwork panel directly.  

I chose yellows and greens, as you can see, and pulled all these fabrics from my stash.  

Since I was working with stash fabrics and scraps that were all manor of different shapes and sizes, I cut out the squares individually and sewed them into rows:  no strip-piecing for me!  (Because I know someone out there will wonder, the squares are 2.5" and finish at 2".  You can use any size square you'd like, but I chose this size because any leftovers would work great for a 1" hexie project I am working on, too.) 


Once the patchwork panel was complete I set about tracing my pattern pieces (for the record, the best $11.99 I ever spent was on my roll of Swedish Tracing Paper... we carry it at the shop if you are local, but I haven't quite figured out a cost-effective way of mailing the rolls of tracing paper out for online customers and therefore haven't listed this most fabulous, useful stuff in the online shop yet, but you really should have some, I insist).

I lengthened the pattern by 2.5" so it would fit the baby longer.  Anna Maria's pattern is for a baby sized 0-3 months, but I figured if I was going to work long and hard on this project it should fit my baby for as long as possible.  Anna Maria gave great instructions for how to lengthen the pattern if you wanted to go that route, too.

The hardest part of the entire project?

Cutting into my patchwork panel.


After finishing the panel and being at the point of needing to move on to the "cutting it up" stage, I looked at the lovely panel of squares up on my design wall for a couple of days before finally taking the plunge and cutting into it.

I love patchwork squares and I could make them all day and be happy, so that part was tough.  It killed me that some of those cute elephants and hedgehogs peeking out at you from the squares were going to be lost and not show up in the finished project.

But, cut into the panel I did.

From there, the sac didn't take very long at all.

Per Anna Maria's suggestion, I hand-stitched the bias edging to the lining, just like you would bind a quilt (I'm someone who loves a little hand-stitching, but you could very easily stitch this part by machine if you wanted to skip that step).


I lined the sac with some of our new organic fleece which had arrived just in the nick of time and miraculously, the color turned out to be oh-so perfect with my patchwork.

I cannot tell you enough how much I love the organic fleece.  


First of all, it's organic (hell-o!) and second of all, it's the softest, most coziest fleece ever.

The fleece is 100% cotton, so it washes up just fine... it has a bit of stretch in it, but nothing a couple of extra pins couldn't handle.

Since our baby is due in December and this is Maine, after all, I thought the warm fleece would be a great match.

Another happy by-product of using the fleece is that it's thick, so the finished Sleeping Sac feels like a quilt, with armholes, that you wrap your baby in.

I wouldn't mind one for myself, actually (I guess that's kind of what a snuggie is, but those things scare me and they can't be half as nice!).

For the backing and bias trim I used this new print from Lotta Jansdotter.  There was lots of stuff that would have matched, but this one I felt was the best choice at the time.


If you wanted to make this Patchwork Sleeping Sac without the patchwork panel, just from one solid fabric or even a cheater print, that would be much faster to stitch up.

Or, of course, if you wanted to use all flannel or all quilting cotton or a mix of the two (depending on where you live and how warm you want your baby to be) you certainly could... lots of good choices!

It was such a fun project: I certainly took the most laborious route and this was a labor of love, but for the next few months "labor" is going to be the name of the game for me, I suppose!

(You have to keep a sense of humor about these things, right...?)

Thanks so much for listening to me jabber on...

I'll see you again soon!

XO,

Rhea


Sunday, September 2, 2012

Happy Labor Day!


We'll be open tomorrow: laboring away on Labor Day.

Although, the gals and I have taken somewhat of a holiday weekend. 

Just for Friday, Saturday, Sunday and Monday, we are taking a break from vacuuming and straightening up and ordering thread and all that boring stuff, freeing us up to wait on customers, fill online orders and then do some sewing! 

I've been working on my Superstar Quilt, Shawna has made a "Race to the Finish" Jelly Roll quilt and Pam has made three of these Heather Bailey bags.  

We're having fun, can you tell?

If you are cruising around on the internet, you should mos def check out my friend Dawn's new blog: it's called "Quit Your Stitchin'" and she makes some great stuff (mostly with our fabrics!).
 
She's a talented lady and one of my favorite people!

Have a Happy Labor Day and I will be back soon with some more baby sewing to share with you all!

XO,

Rhea