(That is the official title.)
Before we begin, let me preface this whole post by saying that there are lots of different ways to pin, and no one way is "right" or "wrong." Certainly there are times when extra-special pinning is called for, but the following is my way of getting the down and dirty, everyday pinning done.
This is excerpted and adapted from my Virtual Turning Twenty class, but fits most any project. Hope it is helpful to you, too!
Now, the whole point of pinning is to temporarily hold your fabrics together in the same way that the stitching will eventually hold everything together. Pinning is not my most favorite thing to do, but I still like it better than cutting (ugh, cutting... you all know how I hate to cut!). Point is, there are times when you have to pin: there's just no getting around it. And as much as pinning might not be my favorite part of quilting, it's much, much better than finding a "gone" place in your stitching and having to go back and re-stitch. Might as well do things right the first time, don't you think?
When quilting, you are normally stitching with a 1/4" seam allowance, so I am going to place all of my pins approximately 1/4" away from the raw edge of my fabrics. If I was stitching with a 5/8" seam allowance, I would place my pins 5/8" away from the raw edge.
I also like to put my pins in parallel to the raw edge (just like the stitching will eventually be parallel to the raw edge).
I also like to weave the point of my pin in and out of the fabric a few times (if you just put it in once, the fabric can pivot around the pin and wiggle and doesn't that defeat the whole purpose of pinning? I mean, if we're going to do this let's DO THIS!)
I also like to think ahead and imagine the direction in which I will be sewing and place the point of the pin so that, as it travels up to the foot of the machine, I will be pulling the pin out towards myself instead of trying to pull it out towards the presser foot.
Whaaaa????
(If that last step has left you scratching your head, the next couple of photos should clear things up for you, so just file that sentence away and keep on chugging with me...)
Here's a photo of how I like my pins to be placed:
There are three pins along the top edge of the fabric in this photo: they are my favorite flat flower pins and they are long and sharp with a nice big flower head that's easy to see and easy to pull out. They're great for quilting when you want a nice long pin, and usually great for garment stitching, too. There are times when a nice long pin is called for and times when a shorter, daintier pin is called for.
I always put the "middle" pin of a section in first, then place the pins on the left and right-hand sides of the fabric. That way, any excess fabric is distributed evenly to both ends of the section.
See how these pins are parallel to the fabrics' raw edge and woven in and out a couple of times?
Here's a close-up:
As I am sewing, because I have placed the pin with the pointy part pointing away from me, I can pull the pins out as I go by pulling the pin heads towards me. Trust me, this is much easier than pulling the heads of the pins out towards your presser foot.
True, this can take a little "getting used to," but once you do it a couple of times, you will be able to think ahead and figure out how you should place your pins so you can pull them out towards you as you are sewing (I promise!).
And because I have woven the pin in and out of the fabric at least a couple of times, that sucker's not going anywhere, unless I want it to.
Although there are a few exceptions to this rule, you should always pull your pins out before you stitch over them. I could tell you some doozies about late-night extractions with pliers from where a needle struck a pin, breaking it in two, sending tiny metal pieces deep into the machine.
And worse, I could tell you some doozies about trips to the emergency room where a needle struck a pin, breaking it in two, sending tiny metal pieces deep into someone's eyes and forehead.
The former has happened to me. The latter, thank goodness, has not.
Sometimes when I am sewing my face is right up in the machine, much, much closer than I realize, and I am probably a good candidate for sewing with safety goggles on, but I much prefer to remove a pin before I stitch over it.
Although there are a few exceptions to this rule (like when I am stitching around a curve or setting in a sleeve), that's my personal "pin removal" policy.
And that's how (in my opinion...) you do "everyday" pinning: with nearly all projects.
Hope the fancy-schmancy tutorial was helpful to you: now go forth and pin!
XO,
Rhea
Tuesday, March 29, 2011
Saturday, March 26, 2011
Community Quilting Day for Russ and Diana Williams
Hello Everyone,
Just a note to let all you locals know that we have decided to hold the community quilting bee for Russ and Diana Williams on Sunday, April 3rd from 12-5. The Williams are our friends and neighbors whose home was destroyed in a fire a week ago. The fire destroyed their master bedroom and spread to all of the rooms on the second floor, including their son's and daughter's bedrooms, so you can imagine that several homemade quilts were lost, either in the fire itself or to smoke and water damage.
Diana is a wonderful quilter and member of Clamshell Quilters, our local quilt guild. She has been a friend, neighbor and customer of Alewives Fabrics for the past 30 years. Just a couple of days before the fire she was in the shop purchasing fabrics for a new baby quilt. Russ and Diana are coping remarkably well: I can only imagine the pain that their family is going through right now. And although it is impossible for me to fully understand what they are feeling, one thing I can do is make a quilt.
If you want to put your skills to action, please join us on April 3rd. Alewives will provide fabric, tools and pizza. We are hoping to be able to piece together at least one quilt top, and will hold subsequent quilting bees until all of the Williams' quilts have been replaced. I have told Diana about the Community's intentions and she will be in on the selection of fabrics, etc. If you decide to come you will be put to work cutting fabric, piecing quilt blocks and stitching together the quilt tops. Our own Barbara Commeau has volunteered to machine-quilt the tops.
Please bring your sewing machine with a 1/4 inch foot, and if you have your own rotary cutter, ruler, scissors, pins, etc. that you are willing to bring, please do so (just make sure to label your tools so they don't get mixed up with anyone else's). Remember, you won't need to bring any fabric: Diana will be selecting from what we have here at the shop. Anything else you would like to bring (food, drinks, tools, etc.) would be most welcome!
And one last favor I will ask everyone who is coming: if you are able, please park either in the lower parking lot or along the road in front of my house as the Shop Hop will be in full swing. Since April 3rd will be the first full weekend of the Shop Hop we want to keep the front parking lot as open as possible for Hoppers who will be coming and going throughout the day.
Thanks so much to everyone who has already volunteered their time. I spoke with Diana yesterday and she and Russ are both overwhelmed and touched with the outpouring of support from the community.
Thanks in advance and we'll see some of you on April 3rd at 12:00 sharp!
XO,
Rhea
PS Thanks also to all of my friends from blogland who have volunteered to help Russ and Diana! As soon as we know what fabrics Diana would like, you can bet I will be putting you all to work as well!
Thursday, March 24, 2011
Back to basics: Ironing 101
Hello one and all,
I have been really busy lately and now I'm having Catholic Guilt about neglecting the blog, so I thought I would share something with you that I have been meaning to share for a while.
The following is an excerpt from one of my Virtual Turning Twenty lesson plans, modified a bit so it makes sense out of context.
My Virtual Turning Twenty class is going quite well, I think (hi, ladies!), but this particular excerpt from the lesson plan could be useful for anyone who quilts...
Think of it as Ironing 101 and I am your professor. I have tenure, too, so don't even think about filing a complaint!
Here goes...
I like to put water in my iron so it is nice and steamy.
The steam not only gives you a nice little semi-facial, sauna-type effect, but it really helps your fabrics to press flat and behave nicely.
For years and years I never used any steam in my iron, because lots of "old school" quilters will tell you that steam will stretch and distort your fabrics, but recently I have been turned on to using steam and now I find it much, much easier to press with a little steam rather than without!
Now I am going to give you a golden kernel of advice that will serve you well throughout your entire sewing career: no one ever taught me this, I think I read it in a book somewhere, and I rarely hear anyone mention it, but it will help you out a LOT when you are ironing and piecing and trying to be accurate.
See this picture below?
These are actually two fabric pieces that were just stitched together and then clipped from the machine. The seam is on the right hand side of the square. I haven't done anything to the pair of fabrics since clipping them from the machine... just brought them over to my ironing board. The two fabrics are right-sides together and you are seeing the wrong side of one of the fabrics:
See how wrinkly this is???
Most people will tell you that after a pieced set of fabric comes off of the machine you can just go ahead and press the seam allowance to one side or the other, but I am going to tell you to "set the seam."
"Setting the seam" is just a technical term for ironing pieced-pairs exactly the way they came off of the machine...
In other words, DON'T FLIP THE PAIRING OPEN, but iron while the two fabrics are still right- sides together and the pairing that was all wrinkly before will get pressed with the iron and will now look like this:
See how nice and neat it now looks?
Let's do a little before and after...
Before: After:
See the difference? It's the weirdest thing, and it seems small, but this helps soooo much later on down the road.
Now that I have passed on that golden kernel of knowledge and you know how to set the seam, let's flip the fabrics open, like this:
We still have wrong sides up, but we are going to press the seam allowance to one side, just like in the photo.
Go ahead and press the seam allowance with the iron.
Be careful when you are pressing that you don't create an extra crease in the seam, inadvertently making your seam allowance larger: you want the seam to lie nice and flat.
Next, we are going to flip the pair over so that the fabrics are RIGHT sides up and give it one last press from the right side:
This is what you should see: a nice, flat, neat, clean pair.
It's so exciting, an accurate, don't you think?
(What can I say, I get excited by these things...)
I know some people don't like ironing (probably the people who DO like cutting!), but personally, I like it a lot.
I like the steam and the heat.
(I am an Aries...)
In my opinion, careful ironing and careful pinning (which we will get to later) are JUST as important as careful cutting.
To review, ironing as I see it is a three-step process:
Step one: "set the seam."
Step two: press the seam allowance from the wrong side.
Step three: flip the fabrics over and give them one last press from the right side.
Any questions???
That's all for Ironing 101, boys and girls... hope you learned something!
If you like, I can follow up with my "Philosopy of Pinning" tutorial one of these days, when I am feeling a similar combination of laziness and guilt...
XO,
Rhea
Sunday, March 20, 2011
Winslow Market Tote class added to the roster
Hello and happy Sunday to everyone,
Just a note to say that I have swip-swapped around some of the classes coming up for April.
Most notably I am going to be holding a class on the Winslow Market Tote on April 10th and 17th. The class will cover construction of the bag from beginning to end: the first weekend we will work on cutting and sewing, the next weekend we will finish up the bag.
If you are a beginning "sewist" in the area and want to try your hand at this bag, I guarantee you will love it! The bag uses 5 fat quarters, plus a couple of coordinating fabrics, so I am predicting the hardest part will be choosing which fabrics you would like to use. Of course, I always think that is the most fun part...
If you would like to sign up for the class, there are some more details here, and you can always send me an e-mail (rhea@alewivesfabrics.com) or call us (207 563 5002) for more info.
See you all again soon, and thanks for your well-wishes for our neighbors!
XO,
Rhea
Saturday, March 19, 2011
Our neighbors house was burned beyond repair in a horrible fire last night. Although no one was hurt, they have lost almost everything they own. This is such a small neighborhood that it feels like it happened to all of us.
The Williamses are going to need a lot of help and support over the next few months.
If you are local, I have been told there is a donation fund set up at the First National Bank in Damariscotta.
We are also planning on holding a community quilting bee here at the shop to help replace some of the quilts they lost in the fire. I will post more information here on the blog and on facebook as soon as we firm up our plans.
If there is a silver lining to the events that unfolded last night, it surely would be that this morning, the entire neighborhood showed up at the Williams' property to help with the clean-up effort...
And that we are all reminded, wherever we live, to take a moment and enjoy our loved ones, our homes and our possessions.
Rhea
Thursday, March 17, 2011
Like a gazelle...
Alewives Fabrics has leapt into the new millenium!
You can now find us here on facebook. Be our friend?
XO,
Rhea
Monday, March 14, 2011
Vote for Dash!
Hello readers,
I don't usually post this kind of thing on my blog, but today I am making an exception.
I have a little story for you all... A story about how you can win a trip to the Galapagos Islands, help out the endangered Monk Seal and make someone's dream come true, but mostly a story about my good friend Dash.
A couple of years ago, a young lady started coming into the shop quite regularly, and we eventually introduced ourselves and became good friends. We found out that we were neighbors, that we shared a mutual love for all things crafty and that we shared several acquaintances in our small little pocket here on the Midcoast.
That young lady is my friend and neighbor Dash Masland and you may recognize her from her blog, or from this blog post of mine.
Long story short, Dash has an incredible opportunity to do what she loves, and we are both asking for your help and support along the way.
Here, maybe you would like to hear a little bit about Dash from the lady herself:
(Dash holding up a pair of interlock-knit pants at the Liesl Gibson workshop this past November and her "Expedition Granted" logo.)
I am a young M.S. marine scientist from Maine who focuses on studying seal diet through fecal DNA. I received my Master's Degree in Marine Sciences at the University of New England and during my graduate degree I was awarded a young explorer's grant from National Geographic. I was recently selected to be one of two young explorers that Nat Geo is highlighting and having "compete" for a second funding opportunity in a competition called Expedition Granted. They are promoting us via TV and the web and will have the public vote for their favorite explorer. If I win, I will be heading to Hawaii to study the Hawaiian Monk seal, looking at diet by using fecal DNA.
I think you probably know where I am going with this: please, please, please vote for Dash. She's a great gal and a hell of a marine scientist to boot. If I were a Hawaiian Monk seal, there's no one I'd rather have studying my fecal DNA, and that's a fact!
Here's how you can help:
Go to this site and find the "Expedition Granted" tab on the right-hand side, where you can learn more about Dash's project and vote for her!
Also, you can check out Dash's personal website at www.dashmasland.com with lots more great info about Dash and her project.
You can also find Dash on Facebook at this link, and on twitter at this link.
And, here's the deal. You can vote for Dash on the National Geographic site once a day, every day until April 7th and every time you vote you are entered to win a trip to the Galapagos! So cool! So, please vote, vote, vote and vote! You will be helping out a local-girl and upping your chances of winning a trip to the Galapagos Islands.
(Sounds like a win/win to me!)
Thanks so much for any and all votes and for helping to spread the word in any way you can!
XO,
Rhea (and Dash!)
Thursday, March 10, 2011
Amy Butler's Cosmo Bag Pattern Review
As promised, here is my review of the Amy Butler Cosmo Bag, which appears on the cover of Amy Butler's new book, Style Stitches.
I want to start off by saying that I love, love, love the Cosmo Bag. I loved everything about the finished product and I will definitely be making another of these bags in the near future. If you remember from a couple of posts ago, my friend Allison went home with this particular bag at the Craft Swap.
However, I do have one criticism of the pattern that I think is pretty significant.
Style Stitches lists this project as being suitable for a beginner, and although I am super-reluctant to disagree or disregard anything upon which the fabulous Mrs. Butler puts her stamp, I have to respectfully advise against a beginner taking this project on.
Normally I am the biggest cheerleader for the "ambitious beginner." Someone who takes on a challenging first project, something a little bit more than they can chew. I think that's a great way to grow and learn and it definitely fits my teaching philosophy...
But, there is a big difference between a "challenging" first project and a "frustrating" first project. After having made the bag, I personally think that this would be a very frustrating project for a beginner.
It's not because any of the steps are challenging in and of themselves, but because I think there are several steps in the making of this bag where the sewist would benefit from prior experience: something a "beginner" by definition does not have.
There are places where you need to match short, fat curves, places where you need to faithfully follow directions without deviation, places where you need to follow written directions that are not accompanied by illustrations, and places where you need to be able to think ahead and anticipate a little bit.
As I said, I had no problems whatsoever, but, with 12 years experience under my belt, this aint my first rodeo! I think a beginner might attempt this and then be frustrated with their results and if it were their first project ever, I think they may even come away frustrated with sewing in general.
Now, stick with me, because that is truly the only criticism I have of this bag. If this pattern had been labeled as an "intermediate level," I would have nothing but good things to say.
Here are some other pearls of wisdom where the Cosmo Bag is concerned:
There was a lot of cutting with this bag, but that is true of any Amy Butler pattern. You aren't just cutting the bag pieces, you are cutting the lining and the interfacing and the pockets as well. Oh, the pockets! Pockets galore on this bag. It would make a great diaper bag for any young, hip moms out there.
If you are a regular reader of this blog you will know that I truly hate cutting. So that was a personal obstacle of sorts, but it always is for me, and I always overcome! You kind of have to do the cutting before doing the sewing. Maybe one of these days I will be rich and famous and can hire minions to do all my cutting for me...
If you are planning on making the Cosmo bag, set aside several hours for cutting. That's right, I said Several. Hours. And labeling the pattern pieces is a very good idea, as well, since several of the pieces look similar in size and it can be hard to keep them straight once you get going.
The biggest, most positive break-through I had concerning this bag was that for once, I used the exact interfacing Amy calls for in most of her bag projects, which is a woven fusible interfacing, or in other words, a thin muslin with a layer of fusible adhesive attached to the wrong side.
I will admit (confession!) that I usually disregard the call for woven fusible interfacing and just use the regular, non-woven fusible interfacing. Even though we carry both types at the shop, the non-woven fusible interfacing is a bit less expensive, and I never really thought it made that much of a difference, so this is usually what I steer my customers towards.
Well, for once, I thought I'd just give the woven-fusible a try and I am a total convert! True, the woven fusible is a bit more expensive, but what a dream to work with! It fuses tight and it fuses the first time. It really helps the bag pieces keep their shape and your finished bag will look exactly like the one in the picture.
Like I said, total convert... Hallelujah!
I have seen the light and must now repent for my wicked ways! Never again will I steer a customer to the less-expensive non-woven but instead go straight for the jugular and strongly suggest (demand) that they give the woven-fusible a try.
I am so in love with the woven-fusible that I listed it in the notions section of the shop. Practically every Amy Butler pattern calls for this stuff, so now you have a go-to resource should you want to give it a whirl yourself.
I think that's it for my experience with the Cosmo Bag, except to tell you that I made mine with these three fabrics, all of which are Amy Butler designs.
Can't wait to see which three I choose to make my next Cosmo bag, BUT I will have to gear myself up to do all that cutting again (any volunteers?)
XO,
Rhea
Monday, March 7, 2011
Tea with the Queen
We are forcing it to be spring around here.
Every year about this time I go "on strike," which means I start wearing my flip flops again in protest of winter and winter-y things in general.
This year, another side effect was an un-apologetically feminine, frilly and floral fat quarter set.
I am calling it "Tea with the Queen" and it will be up for giveaway on Soulemama this weekend.
You know what that means...
Not to toot my own horn, but... I *love*... sigh.
These have already been selling like crazy at the shop and I plan to keep it that way.
If you would like to have Tea with the Queen, you can find what you are looking for right here.
See you all again soon!
XO,
Rhea
Saturday, March 5, 2011
Craft Swap Recap
Oh, lordy, lordy!
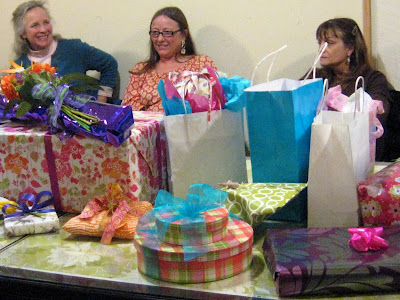
This was one of the best Craft Swaps ever: the gifts were amazing and there was a lot of stealing (totally hedonistic, as my friend Melissa just said) and lots and lots of laughter.
Before the Craft Swap had even begun, I saw some amazing bags and garments coming through the door, so of course I grabbed my camera to take some photos...
There were no less than three Winslow Market Totes in attendance, but I only got pictures of two:
The Winslow Market Tote on the right is my friend Julie's: her colors are red and turquoise and you may be able to pick out the quilt she made during the Mystery Quilt Weekend because the colors are exactly the same.
And pay close attention to the Winslow Market Tote on the left: that belongs to my friend Allison, who left the Craft Swap with my gift, which you will be seeing shortly!
And below is my friend Emily, whom I think is a total hot ticket: she was wearing her Lotus Tunic, made with batiks from the shop and paired with some cute jeans (be still my heart: you know how I love a good tunic or dress with jeans!). I sometimes never think of batiks when I am making garments for myself, but this tunic is so gorgeous I can't stand it! I'll have to remember them when I am making my next ensemble.
Now that the pre-show has been sufficiently covered, onto the Craft Swap photos!
And I totally made out like the proverbial bandit: I got to take home both this gorgeous Marie Antoinette doll (I told you all I wanted one of these, remember? From the Wee Wonderfuls book!) and this Chicken Bumble (not from the Wee Wonderfuls book, but super-cute anyhow), both of which were hand-embroidered by my good friend Anne.
Anne is on her way to a Caribbean cruise this morning: have a great time, Anne ! I love my goodies!
And remember my friend Allison who came to the Craft Swap sporting her Winslow Market Tote? She left the Craft Swap with my gift, which was one of Amy Butler's Cosmo Bags from the cover of her new book Style Stitches.
Be on the lookout for my Cosmo Bag review blog post in the next few days.
There were a few "serendipitous" moments and "happy stories" from the Craft Swap last night:
The first "serendipitous moment" came about because of the horrible weather we had last Friday, which meant we had to reschedule the Craft Swap to take place last night, which meant that the Craft Swap took place on my good friend Nadine's birthday, which meant we had to get a cake... which didn't last long.
And "serendipitous moment" number 2 came about before the Craft Swap, when Dawn's son Gavin gave her his "lucky die" because "It works, Mom." Well, it really did work because Dawn picked the best number, number 1, and at the end of the Craft Swap she got to choose whatever she wanted.
Here she is with her lucky die and with the quilt she chose.
Doesn't Dawn look like she just got away with something? And isn't that quilt just gorgeous? Of course, I am probably super-biased because Donna used a couple of the fabrics I had printed up on Spoonflower that I gave away 2 Craft Swaps ago.
And I have saved the best for last: a "Happy Craft Swap" story.
Our very good friend Chris (You may have heard me mention her shop several times here on the blog. she and her husband Bernie are keeping the Midcoast hip!) has had a bit of a rough year, but just recently got the most wonderful news that she is cancer-free.
We really wanted to celebrate so all of the gals in our "community" here at Alewives (coincidentally the same gals who lose all restraint at Chris' shop) got together, made a La La Log Cabin block from Anna Maria Horner's cotton voile, then Anne stitched them together into a quilt top and Barbara Commeau machine quilted the whole thing.
We surprised Chris with her "We love you/ celebration quilt" at the Swap last night and it was truly a happy moment for all. The cotton voile is so soft and the colors are so bright and happy that we felt they fit the bill perfectly. We wanted to give Chris something that would let her know how we all feel about her: that she is such a beautiful person inside and out and she deserves a memento from her biggest fans.
Congratulations, Chris: your little Midocast Maine community loves you to pieces and couldn't do without you!
And I think that about sums up the whole evening.
This is really just a sampling of what went on: there were lots of funny moments and lots of amazing crafts, too. Way too many for me to recount on this blog.
If you like what you see and you are local-ish, we will do our next Craft Swap in early summer and we would love to see you there: the more the merrier!
Thanks to the 27 ladies who came and I will see you all again soon!
XO,
Rhea
Thursday, March 3, 2011
"Little Things to Sew" and "Modern Workshop" pre-cuts have arrived!
I tried my best to be patient for this book to arrive, but it was sooo, sooo very hard.
Little Things to Sew, the first book by Oliver+S creator Liesl Gibson finally arrived and has been the subject of much cooing here at the shop.
We were lucky enough to have Liesl come and visit us here at Alewives this past November, and she brought with her some of the samples from the book, so I have had an up-close and personal look at these projects and I am so pleased to say that the gorgeous photography in the book does do them justice. It's not often that you can say that. The book's photography was done by Laurie Frankel and let me tell you, she can come and photograph for me any day of the week and twice on Sunday.
My favorite project from Little Things to Sew is without a doubt the cozy winter hood: those little ears kill me! I am dying to make one of these for my little friend Olive, maybe with a matching set of mittens.
Little Things to Sew is a real bargain: especially when you consider that you are getting 20 full-sized patterns (no photo-copying for you!) and the book is hard-cover, absolutely gorgeous (have I mentioned the photography?) and includes 2 paper dolls in the back of the book for your children to play with. Or for you to play with... If you feel so inclined... *cough, cough*
Changing subjects and, as if on cue, we received our shipment of "Modern Workshop" pre-cuts today.
"Modern Workshop" is Liesl's newest line of fabrics for Moda, and although right now we only have pre-cut charm squares and jelly rolls available, the yardage from this collection should be arriving in April.
The charm squares especially seem to go fast, so if you would like a pack or two it may be advisable to pounce.
Wouldn't you love to make something from Liesl's new book? Or her new fabric? Or both?
Yes, please! I know I would! Can I go home and play now?
XO,
Rhea
Subscribe to:
Posts (Atom)